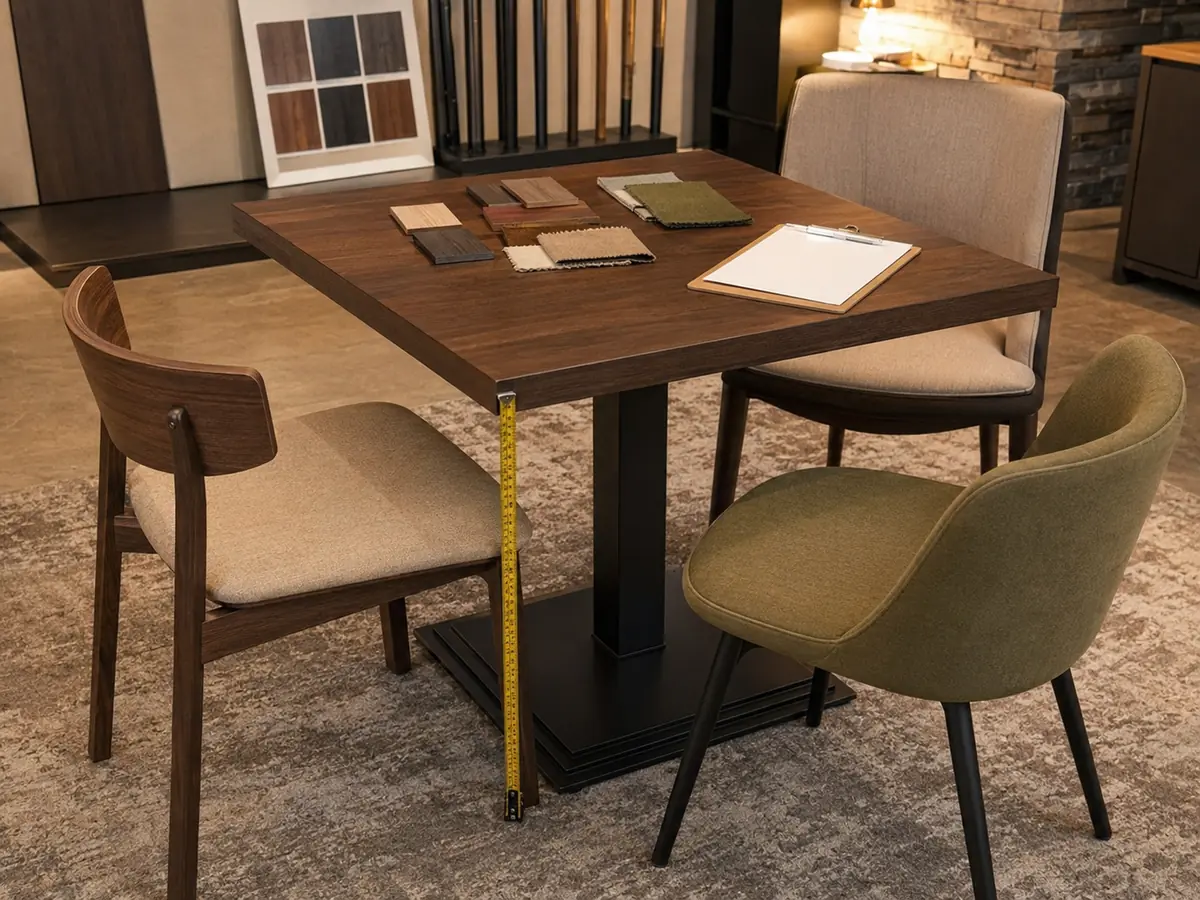
Standard restaurant booth sizing is easiest when you separate booth seat size from layout clearances. A common starting point is 18″ seat height, 16–18″ seat depth, and 36–42″ back height, then you scale bench length by ~24″ per person. For planning layout, keep 48″ (122 cm) for main aisles and 36″ (91 cm) for secondary aisles where service flow is lighter. If you’re using back-to-back booths with a table, the typical total footprint (bench + table + bench) is about 66–72″, depending on table width. A good manufacturer can support both standard and custom booth sizing so your seating feels comfortable without compromising traffic flow or compliance. 🪑
Standard Restaurant Booth Dimensions (Quick Chart)
Standard Booth Sizes by Seating Capacity (2/4/6/8 people)
Booth “size” gets confusing fast, so I plan using two numbers: bench length (how many people fit) and overall footprint (how much floor space it takes). The chart below lists typical bench lengths + matching table sizes for common 2/4/6/8-seat booth setups. I always start by looking at how many guests I want to seat in each booth. This helps me pick the right size for comfort and flow. Here’s a quick chart I use when planning restaurant booths for different group sizes:
| Seating Capacity | Typical Booth Type | Recommended Dimensions (inches) |
|---|---|---|
| 2 people | Single Booth | Bench 48″ L + table 24″ W × 30″ L |
| 4 people | Double Booth | Bench 48″ L per side + table 24″ W × 48″ L |
| 6 people | Double Booth | Bench 72″ L per side + table 24–30″ W × 60″ L |
| 8–10 people | 3/4 Circle Booth | Bench 96″ L per side + table 24–30″ W × 72″ L |
📝 Tip: I always measure the space on-site before choosing booth sizes. This helps me avoid surprises later.
I notice that circle and corner booths work best for larger groups. Straight booths fit smaller parties and keep the layout simple.
Booth Dimensions in Inches vs CM (Conversion Table)
I use this conversion table to quickly switch between inches and centimeters when planning booth layouts. This makes it easy to share plans with suppliers or contractors who use different units.
| Inches | Centimeters |
|---|---|
| 24″ | 61 cm |
| 30″ | 76 cm |
| 48″ | 122 cm |
| 60″ | 152 cm |
| 90″ | 229 cm |
📏 I keep this table handy for international projects and supplier communication—especially when specs move between inches and centimeters.
How to Use This Guide (Measure → Choose → Lay Out)
When I set up booth seating, I always follow a simple process: Measure your space, choose the right booth style, and lay out your plan for comfort and flow. This method saves time and helps me avoid costly mistakes. I want every booth to fit perfectly and make guests feel welcome.
What to Measure On-Site (5 Key Measurements)
Before I order booths, I grab my tape measure and check these five things on-site:
- Wall Length
I measure the full length of each wall where I want booths. This tells me how many booths I can fit. - Booth Length
I plan bench length using ~24″ per person. As a quick guide: 48″ seats 2 adults, 72″ seats 3, and 96″ seats 4 (per side). - Seat Depth vs Booth Footprint
I keep seat depth around 16–18″ for dining comfort. Then I confirm the overall booth depth (footprint), which includes the backrest thickness—often landing around 22–26″ total, depending on design. - Booth Height
I aim for a height between 36″ and 48″. Most booths feel best at 42″ to 43″. - Table Size
I plan for at least 20″ of table space per person. This keeps everyone happy and avoids crowding.
Here’s a quick table I use to keep my measurements organized:
| Measurement Type | Recommended Size | Notes |
|---|---|---|
| Length | 24″, 36″, 48″ | Seats up to 3 people |
| Seat Depth | 16″–17″ | 18″–19″ for extra comfort |
| Height | 36″–48″ | 42″–43″ is standard |
| Table Size | 20″ per person | Ensures proper fit |
Fast Rule-of-Thumb for Planning
I use a quick rule-of-thumb to plan booth layouts in any restaurant: Booths save space compared to tables and chairs, so I can fit more guests without making the room feel crowded.
I use three quick checks before I finalize any plan:
- Aisles: keep 48″ for main aisles and 36″ for secondary aisles.
- Bench seating: assume ~24″ per person so you don’t over-pack guests.
- Footprint: for back-to-back booths + table, plan roughly 66–72″ total width (bench + table + bench).
If any of these fail on the floor, I adjust the booth style or table width before ordering.
😊 I always ask myself, “Will guests and staff move easily?” If the answer is yes, I know my layout works.
I use online booth calculators to double-check my plan. This way, I make sure every booth fits and looks great.
If I follow these steps, I get a layout that feels open, efficient, and ready for busy service. I want my restaurant to run smoothly and keep guests coming back.
Restaurant Booth Terminology (With Simple Diagrams)

Booth vs Banquette (What’s the Difference?)
Booth seating gives guests privacy and comfort, while banquette seating offers flexibility and style. I get this question a lot when planning a restaurant layout. Let me break it down for you:
- Booths create a cozy, enclosed space. I use them when I want guests to feel tucked away from the crowd. Booths usually have high backs and fixed tables. They work best for groups who want a little privacy.
- Banquettes are more versatile. I can run a banquette along a wall or even place it in the middle of a room. Banquettes let me change table arrangements easily. They fit all kinds of spaces, from cafés to hotel lounges.
- Both booths and banquettes share basic parts like the seat, back, and base. The big difference comes from how I lay them out and how guests use them.
🛋️ Tip: I always think about the vibe I want. Booths feel intimate. Banquettes feel open and social.
Single Booth (Wall Side)
A single booth sits against a wall and seats two people comfortably. I use single booths when I want to save space but still offer a cozy spot for guests. The design is simple: one bench, one table, and a backrest against the wall.
Here’s what I look for in a single booth:
- Dimensions: Most single booths measure about 46 inches long and 23 inches wide.
- Seating Capacity: Perfect for two people. Sometimes I squeeze in a third if the table is a little longer.
- Layout: I line up single booths along a wall to create a neat row. This keeps traffic flowing and makes cleaning easy.
I like single booths for small cafés or tight corners. I pick the finish that matches my venue’s style.
Double Booth (Back-to-Back)
A double booth features two benches placed back-to-back, seating up to four people. I use double booths when I want to maximize seating in a narrow space. The design puts two booths together, sharing a center backrest.
Here’s a quick table to show the difference:
| Booth Type | Dimensions (L x W) | Seating Capacity |
|---|---|---|
| Single Booth | 46″ x 23″ | 2 |
| Double Booth | 46″ x 44″ | 4 |
- Double booths work great in the middle of a dining room. I can create long rows for busy service.
- The shared back saves space and gives guests a little privacy.
- I choose double booths when I want a clean, organized look.
🍽️ Note: I always check the aisle width between double booths. I want servers to move easily and guests to feel relaxed.
I can pick the size, material, and color to match my brand. When I plan my layout, I use double booths to boost seating without crowding the room.

Corner Booth / L-Shape
A corner booth, also called an L-shape booth, fits perfectly into the corner of a room and seats more people in less space. I love using corner booths when I want to make the most of every inch in a restaurant or café. These booths wrap around the corner, creating a cozy spot that feels private and inviting.
When I plan a corner booth, I look at the following features:
- Shape: The booth forms an “L” and hugs two walls. This design works well for groups of four to six.
- Dimensions: Each side usually measures between 48 and 60 inches long. The seat depth stays around 18 inches for comfort.
- Table: I use a square or rectangular table in the middle. Sometimes I pick a round table for a softer look.
Here’s a quick table to show typical corner booth sizes:
| Booth Side Length | Seat Depth | Back Height | Group Size |
|---|---|---|---|
| 48″–60″ | 18″ | 36″–42″ | 4–6 |
🛋️ Tip: I always check the corner angle. Most booths use a 90-degree angle, but custom angles are possible for unique spaces.
Corner booths help me create a special area for families or groups. They also keep the main dining area open for easy movement. I find that guests love the tucked-away feel and the extra comfort these booths provide.
Custom Booth (When standard won’t work)
Custom booths solve layout problems when standard sizes just don’t fit. I run into this challenge often, especially in older buildings or unique venues. Sometimes the wall is too short, the corner is odd, or I want a booth with a special shape or finish.
Here’s when I choose a custom booth:
- The space has unusual dimensions or angles.
- I want a booth longer or shorter than standard sizes.
- The design needs to match a specific brand style or color.
- I need special materials, like water-resistant fabric or a certain wood finish.
I always start by measuring the space carefully. Then I sketch out what I want, including the booth’s length, depth, height, and any special features. Their team helps me turn my ideas into a real product, whether I need a curved banquette, an extra-tall back, or a booth with built-in power outlets.
🛠️ Note: I always prepare a list of must-have features before I ask for a custom quote. This saves time and helps the supplier understand my vision.
Custom booths let me create a one-of-a-kind look for my restaurant, café, or hotel. I can match the booth to my brand and make sure every guest feels comfortable. If you want a booth that stands out, custom is the way to go. 😎
Restaurant Booth Dimensions (Seating Comfort + Footprint)
What “Width/Depth/Height” Means in Real Layouts
Width, depth, and height are the three measurements that shape how booth seating feels and fits in your restaurant. I always start by looking at these numbers because they decide how comfortable guests are and how many booths I can fit. Width tells me how much space each diner gets side-to-side. Depth shows how far the seat goes from front to back. Height controls privacy and the overall look.
When I measure a booth, I check these three things:
- Width: This is the distance from one end of the bench to the other. It decides how many people can sit together.
- Depth: This is the distance from the front edge of the seat to the backrest. It affects legroom and posture.
- Height: This is how tall the seat and backrest are. It changes how private and cozy the booth feels.
I use these measurements to plan the layout and make sure every booth fits the space. 🧮
Booth Seat Height (and why it matters)
The recommended booth seat height for most restaurants is 18 inches, which matches standard dining chairs and keeps guests comfortable. I always pay attention to seat height because it affects how easy it is for people to sit down and get up. If the seat is too low, older guests or those with mobility issues may struggle. If it’s too high, legs dangle and comfort drops.
Here’s a quick table that shows why 18 inches works best:
| Measurement Type | Recommended Height | Reason for Recommendation |
|---|---|---|
| Booth Seat Height | 18 inches | Matches most commercial restaurant chairs for comfort |
| Customer Demographics | Diverse needs | Ensures accessibility and enhances overall dining experience |
I find that sticking to 18 inches makes booth seating work for almost everyone. It’s a simple way to keep guests happy, whether they’re families, business groups, or seniors. Most commercial booths follow this standard unless you request a special seat height for your concept or guests.
Booth seat height is typically 18″, because it pairs cleanly with 30″ dining tables and matches most commercial chair ergonomics.
🪑 I always double-check seat height before ordering. It’s a small detail that makes a big difference in guest satisfaction.

Booth Seat Depth vs Overall Depth
Booth seat depth and overall depth work together to create a comfortable and efficient seating experience. I look at seat depth first because it affects how guests sit. A seat depth of 16 to 18 inches gives enough room for most people to sit upright and enjoy their meal. If the seat is too shallow, guests feel cramped. If it’s too deep, smaller guests may not sit comfortably.
Here’s a table that helps me compare seat back depth and clearance:
| Measurement Type | Recommended Depth |
|---|---|
| Backrest Thickness | 3” to 6” |
| Seat Depth (usable) | 16” to 18” |
I always balance seat depth with the thickness of the backrest. A thicker backrest means less seat space, so I adjust the overall depth to keep comfort high.A good manufacturer can adjust the combination, whether I want a plush back or a slim design.
A shallower seat with a straight back encourages guests to sit upright, which is great for dining or working. If I want a more relaxed vibe, I might go for a deeper seat. I keep in mind that the overall depth includes both the seat and the backrest, so I measure carefully to avoid crowding the aisles.
😊 I always test booth seating with real people before finalizing my order. It’s the best way to make sure the dimensions work in practice.
Booth Back Height
The standard booth back height for most restaurants falls between 36 and 42 inches. This range gives guests enough privacy without making the space feel boxed in. I always check this measurement first because it changes the whole vibe of a dining area.
When I pick a booth back height, I think about three things:
- Privacy: Taller backs (closer to 42 inches) block more noise and give guests a sense of their own space. I use these in busy restaurants or when I want a cozy, intimate feel.
- Openness: Shorter backs (around 36 inches) keep the dining room open and bright. I like these for cafés or casual spots where I want energy and easy conversation.
- Style: The booth back height sets the tone. A high back looks dramatic and upscale. A low back feels relaxed and modern.
Here’s a quick table:
| Booth Back Height | Best For | Look & Feel |
|---|---|---|
| 36 inches | Cafés, casual dining | Open, social |
| 42 inches | Restaurants, lounges | Private, upscale |
🪑 Tip: I always sit in a sample booth before I decide. The right back height makes a big difference in comfort and atmosphere.
36–42 Inches
A booth back height of 36–42 inches works for almost every restaurant layout. I find that 42 inches gives the best balance between privacy and style. Guests feel tucked away, but the room still feels open. If I want a more casual look, I go with 36 inches.
Seat Back Thickness / Depth (3–6″)
The typical seat back thickness for restaurant booths ranges from 3 to 6 inches. This measurement matters more than most people think. A thicker back means more comfort, but it also takes up more floor space.
Here’s how I decide what works best:
- 3–4 inches: Slim and space-saving. I use this when I want to fit more booths in a tight area.
- 5–6 inches: Plush and supportive. I pick this for upscale venues or when guests will sit for a long time.
I always balance comfort with space. If I choose a thick back, I make sure the seat depth still feels right.
| Seat Back Thickness | Comfort Level | Space Used | Best For |
|---|---|---|---|
| 3″ | Firm | Minimal | Fast-casual, small cafés |
| 4″ | Balanced | Moderate | Most restaurants |
| 5–6″ | Plush | More | Lounges, fine dining |
😊 I always ask my supplier for a sample swatch or mockup. It helps me see how the thickness feels in real life.
Booth Length (24/30/44/48/60″) — How many people does each fit?
Booth length decides how many guests can sit comfortably on each side. I use standard booth lengths to plan seating and avoid crowding. Here’s how I match booth length to group size:
- 24 inches: Seats one person. I use this for solo diners or as an add-on at the end of a banquette.
- 30 inches: Fits two people side by side. Great for couples or small tables.
- 44 inches: Seats two to three people. I use this for flexible seating in cafés.
- 48 inches: Fits three people comfortably. This is my go-to for most restaurant booths.
- 60 inches: Seats up to four adults. Perfect for families or larger groups.
Here’s a table:
| Booth Length | Seats (per side) | Best Use Case |
|---|---|---|
| 24″ | 1 | Solo diner, banquette end |
| 30″ | 2 | Couples, small tables |
| 44″ | 2–3 | Cafés, flexible seating |
| 48″ | 3 | Standard restaurant booths |
| 60″ | 4 | Families, group seating |
🍽️ Note: I always allow at least 24 inches per person for comfort. If I want to squeeze in more guests, I risk making the booth feel cramped.
When I plan a new layout, I measure the wall and divide by the booth length. This tells me how many booths I can fit. Booth lengths can be adjusted for custom projects, so you don’t have to settle for a one-size-fits-all solution.

How Much Space Per Person on a Booth Bench?
Each person needs at least 24 inches of bench space to sit comfortably on a restaurant booth. I use this rule every time I plan seating. If I squeeze guests too close, they feel cramped and unhappy. If I give them enough room, they relax and enjoy their meal.
Here’s a quick guide I follow:
- 24 inches per person: Standard comfort for adults.
- 20–22 inches per person: Works for kids or quick-service spots.
- 26–28 inches per person: Feels extra spacious, great for upscale venues.
| Group Size | Total Bench Length | Space per Person | Comfort Level |
|---|---|---|---|
| 2 | 48″ | 24″ | Standard |
| 3 | 72″ | 24″ | Standard |
| 4 | 96″ | 24″ | Standard |
I always ask myself, “Would I want to sit here for an hour?” If the answer is yes, I know I’ve planned enough space. We helps me adjust bench lengths for special needs, like family-friendly booths or VIP seating. 🍽️
Note: I never count the corners or table legs when measuring space per person. Only the clear, usable bench area matters.
Back-to-Back Booth + Table Footprint (Total Width)
A typical back-to-back booth setup (bench + table + bench) lands around 66–72″ total width, depending on table width and bench depth. I calculate it like this: bench depth ~23–24″ per side + table width ~18–24″. I always tape this footprint on the floor before ordering, so aisles don’t get squeezed.
Pro Tip: I keep at least 36″ (91 cm) for secondary aisles and 48″ (122 cm) for main aisles. Anything tighter than 36″ quickly feels cramped for servers and guests.
Custom Booth Dimensions (When Standard Sizes Don’t Fit)
Sometimes, standard booth sizes just do not work for your space, and that is when custom booth dimensions become the best solution. I have seen many restaurants and cafés with odd corners, tight nooks, or long walls that need a special fit. When I run into these situations, I know a custom booth will help me use every inch of my floor plan.
Custom booths let me match the seating to my exact needs. I can adjust the length, depth, or height. I can even change the shape to fit a curve or a corner. This way, I do not waste space or leave awkward gaps. I also get to pick the materials and finishes that match my brand.
Here is when I usually need custom booth dimensions:
- The wall is too short or too long for a standard booth.
- I want a booth to fit around a column or a curve.
- My space has unique angles or tight corners.
- I need extra-deep or extra-tall seating for comfort or style.
🛠️ Tip: I always measure my space twice before I order a custom booth. This helps me avoid mistakes and keeps my project on track.
We makes it easy for me to get the right fit. Their team helps me design a booth that works for my restaurant, café, or hotel. I send them my measurements, and they handle the rest.
When to Choose Custom Sizes
I choose custom booth sizes when my space, brand, or guest needs cannot be met with standard options. Sometimes, I want my restaurant to stand out with a unique look. Other times, I need to solve a tricky layout problem. Custom sizes give me the flexibility to do both.
Here are the main reasons I go custom:
- Odd-shaped rooms: My dining area has angles or curves that do not fit standard booths.
- Special seating needs: I want more legroom, higher backs, or deeper seats for comfort.
- Branding: I need a booth that matches my color scheme or design theme.
- Maximizing capacity: I want to fit more guests without crowding the room.
- ADA compliance: I need accessible seating for all guests.
Custom booths help me create a space that feels special and works for everyone.
When I work with an experienced hospitality supplier, custom sizes are usually straightforward. Good teams provide drawings, confirm clearances, and help prevent common layout mistakes.
Common Custom Requests (Top 6)
The most common custom booth requests I see focus on size, shape, and special features. Over the years, I have noticed that most buyers ask for similar changes to standard booths. Here are the top six custom requests I handle:
| Custom Request | Why I Choose It |
|---|---|
| Extra-long booth | To seat large groups or fill long walls |
| Curved or corner booth | To fit unique spaces or create flow |
| Extra-deep seat | For added comfort or lounge feel |
| Higher backrest | For more privacy or dramatic style |
| Special upholstery or finish | To match branding or add durability |
| Built-in power or lighting | For modern convenience and guest needs |
I always talk with my supplier about these options before I order. A wide range of custom features makes it easier to match the booth to the venue’s needs.
⚡ Note: Custom booths take a little more planning, but the results are worth it. My guests notice the difference, and my space feels unique.
I find that custom booths help me solve problems and create a better experience for everyone. If you want your restaurant to stand out, custom booth dimensions are the way to go.
What to Prepare for a Custom Quote
I always get the best results from custom booth orders when I prepare clear details before reaching out for a quote. If you want a booth that fits your space perfectly, you need to give your supplier the right information. This saves time and helps you avoid mistakes.
When I want a custom booth, I get ready first. I make a list of everything the supplier needs to know. This helps them build the booth just right for my space.
- Exact Measurements
I measure the wall, booth depth, seat height, and back height. I write down each number in inches and centimeters. - Booth Style
I pick if I want a single, double, corner, or curved booth. If my space is different, I draw a simple picture. - Seating Capacity
I tell the supplier how many people should fit in each booth. This helps them choose the right size. - Material Preferences
I decide if I want solid wood, metal, or upholstery. I say if I need water-resistant fabric or a special finish. - Color and Finish
I choose colors that match my brand. I send pictures or samples if I have them. - Special Features
I list extras like power outlets, lights, or storage. I say if I need ADA accessibility. - Project Timeline
I share when I need the booth delivered and installed. This helps the supplier plan their work.
📝 Tip: I always check measurements and details twice before sending them to the supplier. Clear information means fewer changes and faster quotes.
Here’s a table I use to keep my custom booth request organized:
| Detail | Example | Why It Matters |
|---|---|---|
| Wall Length | 120″ (305 cm) | Fits booth to space |
| Booth Depth | 24″ (61 cm) | Ensures comfort |
| Seat Height | 18″ (46 cm) | Matches table height |
| Material | Upholstered, water-resistant | Matches venue needs |
| Color | Navy blue, walnut wood | Brand consistency |
| Special Features | USB outlets, high back | Guest convenience, privacy |
| Timeline | 60 days | On-time opening |
If I get these details ready, I get a quote that matches what I want. I avoid delays and make sure my booth fits my restaurant, café, or hotel just right. 🛠️

Yezhi Furniture Customization
Yezhi Furniture makes custom booth seating easy for any hospitality project. I work with their team because they know what restaurants, cafés, and hotels need. They let me pick the size, style, and materials I want.
When I order from Yezhi Furniture, I can:
- Mix different models and colors in one order.
- Pick from solid wood, metal, or strong upholstery.
- Ask for special finishes like bronze or gunmetal.
- Add custom features like power outlets, lights, or tall backs.
- Get help with ADA-compliant designs.
Their designers help me make my ideas better. I send my measurements and style choices, and they make a plan that fits my brand. We helps me from the first drawing to the final delivery.
😊 Note: I like their quick replies and clear messages. They keep my project on track and fix any problems with a replacement or credit.
Here’s what for custom booths:
| Custom Option | Benefit |
|---|---|
| Mix-model orders | Flexible design, cohesive look |
| Custom dimensions | Perfect fit for any space |
| Material choices | Match durability and style |
| Special finishes | Unique, upscale appearance |
| Project support | Expert advice, smooth process |
If you want booth seating that looks special and lasts a long time, Yezhi Furniture is a good choice. Their custom options help me make a space that feels unique and friendly for every guest. 🚀
Table Pairing for Booth Seating
Table Widths
The best table width for booth seating is usually 24 inches, which gives each guest enough space to eat and move comfortably. I always look at table width first because it sets the tone for how cozy or roomy the booth feels. If the table is too narrow, plates and glasses get crowded. If it’s too wide, guests have to reach too far for food or conversation.
Here’s a quick table I use when picking booth tables:
| Table Type | Standard Width |
|---|---|
| Deuce (2 seats) | 24″ |
| Four-top | 24″ |
| Six-top | 24″ |
I find that 24 inches works for almost every booth setup. It keeps things neat and makes service easier. Sometimes, for larger groups or special layouts, I might go up to 30 inches, but 24 inches is my go-to. 🍽️
Tip: I always check the width with sample place settings before I order. This helps me avoid surprises on opening day.
Table Lengths
The right table length depends on how many people I want to seat in each booth. For most restaurant booths, I use these standard lengths:
- 30 inches for two people (deuce)
- 48 inches for four people
- 60 inches for six people
Here’s a table that shows how I match table length to booth size:
| Seating Capacity | Table Length |
|---|---|
| 2 people | 30″ |
| 4 people | 48″ |
| 6 people | 60″ |
I always measure my booth before picking the table length. If the table is too long, it sticks out and blocks the aisle. If it’s too short, guests feel cramped. A supplier can provide custom table lengths when your space needs a tighter fit. That way, every booth fits just right.
Table Heights
The standard table height for booth seating is 30 inches, which matches most dining chairs and keeps guests comfortable. I always stick to this height unless I’m designing a bar area, where I use 42-inch high tables.
Here’s a quick reference for table heights:
| Table Use | Standard Height |
|---|---|
| Dining Booth | 30″ |
| Bar Booth | 42″ |
I find that 30 inches lets guests sit naturally, with their arms at a good level for eating and talking. If the table is too high or too low, people notice right away. I always double-check this measurement before placing an order. Most suppliers can provide both dining-height and bar-height options to match your concept. 🪑
Note: I always test table height with a sample booth before finalizing my layout. Comfort comes first in every project.
Legroom & Knee Clearance (The #1 Comfort Complaint)
The best booth seating layouts give each guest at least 12–14 inches of clear knee space between the seat edge and the table base. I always check this first because nothing ruins a meal faster than cramped legs. When I sit at booth tables, I want to slide in and out easily. If my knees hit the table or the base, I know the design needs work.
Here’s what I look for when planning legroom:
- Minimum knee clearance: 12 inches from the seat edge to the table base.
- Ideal knee clearance: 14–16 inches for extra comfort, especially for adults.
- Table height: 30 inches from the floor to the tabletop keeps knees from bumping underneath.
I use this quick table to double-check my plans:
| Measurement | Minimum (inches) | Ideal (inches) |
|---|---|---|
| Knee Clearance | 12 | 14–16 |
| Table Height | 30 | 30 |
😊 I always test a sample booth with real people before finalizing. If guests can cross their legs and move freely, I know I got it right.
Table Overhang and Legroom
A table overhang of 3–4 inches beyond the booth seat edge gives guests the space they need for comfort and easy entry. I pay close attention to this detail because it affects how people sit and move. If the table sits too far back, guests lean forward and feel cramped. If it sticks out too much, it blocks the aisle.
Here’s how I plan the overhang for booth tables:
- Standard overhang: 3–4 inches past the seat edge.
- Extra overhang: Up to 5 inches for larger booths or when guests need more space.
- No overhang: Avoid this setup. It makes eating awkward and limits leg movement.
I always measure from the front of the seat to the table edge. This small detail makes a big difference in how comfortable the booth feels.
📝 Tip: I ask the supplier for a simple mockup (or drawing) of the booth + table together before production. This helps me see the overhang and legroom in real life.
Best Table Base Types for Booths (Pedestal vs 4-Leg)
Pedestal bases work best for booth seating because they give guests more legroom and make cleaning easier. I have tried both pedestal and 4-leg tables in different projects. Pedestal bases always win for comfort and practicality.
Here’s a quick comparison:
| Table Base Type | Pros | Cons |
|---|---|---|
| Pedestal | Maximum legroom, easy to clean, stable | Slightly higher cost |
| 4-Leg | Classic look, lower cost | Legs get in the way, harder to clean |
I use pedestal bases for most booth tables. They let guests slide in and out without bumping their knees. They also make it easier for staff to sweep and mop under the table. For some vintage or rustic designs, I might use a 4-leg base, but only if space allows.
🍽️ Note: I always match the table base to the booth style and guest needs. Yezhi Furniture offers both options, so I can pick what works best for my project.
Booth Spacing and Layout

Minimum Space Between Booths (What feels cramped vs workable)
The minimum space between restaurant booths should be at least 36 inches from the back of one booth to the back of the next to avoid a cramped feeling and keep guests comfortable. I always check this measurement first when planning my layout. If I squeeze booths too close together, people feel boxed in and servers struggle to move. I want every guest to have enough room to slide in and out without bumping into someone else.
I separate footprint from aisle clearance:
- Footprint (booth + table + booth): usually 66–72″ total for back-to-back booths with a table.
- Aisle clearance (walkway): keep 48″ for main aisles and 36″ for secondary aisles.
This keeps guests comfortable and prevents service bottlenecks.
I use these numbers every time I lay out restaurant booths. A good supplier can double-check footprints and aisle clearances so the dining room doesn’t end up feeling crowded.Yezhi Furniture can adjust booth tables and seating to match my exact needs, so I never have to compromise on comfort.
Tip: I always walk the space myself before ordering. If I can move easily between booths, I know my guests will feel comfortable too.
Aisle Widths for Service Flow
Aisle widths should be at least 48 inches in main walkways to allow smooth service flow and safe movement for guests and staff. I pay close attention to aisle size because it affects how fast servers can deliver food and how easy it is for guests to get to their seats. Narrow aisles slow everything down and make busy hours stressful.
Here’s what I use for aisle planning:
| Aisle Type | Recommended Width (inches) | Best Use Case |
|---|---|---|
| Main Aisle | 48 | High-traffic, main walkways |
| Secondary Aisle | 36 | Between booths, side paths |
| Wall Walkway | 24–30 | Against walls, tight spaces |
I always keep main aisles wide enough for two people to pass each other. For side aisles between booths, I use 36 inches if space is tight, but I never go below that. A supplier’s footprint drawings help balance seating capacity with service efficiency.When I work with Yezhi Furniture, their team helps me double-check my measurements so I never end up with a crowded dining room. 🚶♀️
Note: I use painter’s tape to mark out aisle widths on the floor before finalizing my plan. This simple trick helps me see if the space feels right.
Booth + Table Spacing (From seatback to table edge)
I focus on usable sitting distance: from the back cushion to the table edge, aim for about 16–18″ so knees don’t get jammed and guests don’t have to lean forward. I always measure this distance because it decides how easy it is for people to sit down, eat, and get up. If the table sits too close to the seatback, knees get cramped. If it’s too far, guests have to lean forward to reach their food.
Here’s a quick table I use for booth seating comfort:
| Measurement | Recommended Range (inches) | Why It Matters |
|---|---|---|
| Seatback to Table Edge | 16–18 | Legroom, easy entry |
| Table Overhang (past seat) | 3–4 | Comfortable reach |
I always test this spacing with a sample booth before placing my order. A supplier can adjust table position and seating specs so you don’t have to compromise on comfort.
😊 If guests can cross their legs and move freely, I know I got the booth seating dimensions right.
Layout Patterns (Wall banquette / Double rows / Corner)
The three main booth layout patterns are wall banquette, double rows, and corner booths, each offering unique benefits for restaurant flow and guest experience. I always start by picking the pattern that matches my space and service style. Let me break down each option.
- Wall Banquette:
I use wall banquettes when I want to maximize seating along one side of the room. These booths run straight against the wall, making the most of long spaces. Guests get privacy on one side and easy access on the other. Wall banquettes work well in cafés and casual restaurants. I find cleaning and service easier with this pattern. - Double Rows:
Double rows mean placing booths back-to-back in the center of the dining area. I like this pattern for busy restaurants. It creates neat lines and lets me fit more guests without crowding. Double rows also help with traffic flow since aisles run on both sides. I always check the total footprint before installing double rows, especially with booth tables in the middle. - Corner Booths:
Corner booths fill unused space and create cozy spots for groups. I use L-shaped or curved booths in corners to seat families or larger parties. These booths feel private and make the dining room look inviting. Custom corner booths can be built to fit odd angles or tight spaces when you provide accurate measurements.
Here’s a quick table to compare layout patterns:
| Pattern | Best For | Space Efficiency | Guest Experience |
|---|---|---|---|
| Wall Banquette | Long walls, cafés | High | Semi-private |
| Double Rows | Large dining rooms | Very high | Organized, social |
| Corner Booths | Odd corners, groups | Moderate | Cozy, private |
😊 I always sketch my layout before ordering. Seeing the patterns on paper helps me spot problems early.
Traffic Flow (Entry, server routes, busy hours)
Good traffic flow means guests and servers move easily through the restaurant, even during busy hours. I focus on entry points, main walkways, and server routes when planning booth layouts. If people bump into each other or get stuck, service slows down and guests feel uncomfortable.
Here’s how I keep traffic moving:
- Entry Points:
I place booths away from the main entrance. This keeps the entry clear for arrivals and avoids crowding. - Server Routes:
I design wide aisles between booths. Servers need space to carry food and drinks without squeezing past guests. I use at least 48 inches for main aisles and 36 inches for side paths. - Busy Hours:
I plan for peak times. I leave enough space for guests to get in and out quickly. I avoid placing booths near restrooms or kitchen doors. - Flow Around Booth Tables:
I make sure booth tables don’t block walkways. I test the layout with chairs pulled out to see if people can pass easily.
Here’s a checklist I use for traffic flow:
- Can two people walk side by side in the main aisle?
- Are server stations easy to reach from all booths?
- Is there a clear path to exits and restrooms?
- Do guests have space to slide in and out of booths?
I adjust booth sizes and layouts for traffic flow by checking aisle widths and taping out footprints. Their team knows how to balance seating capacity with comfort.
🚶♂️ I walk the space myself before finalizing the plan. If I can move easily, I know my guests and staff will too.
Layout Checklist (Before You Buy)
I always use a layout checklist before buying booth seating to avoid costly mistakes and make sure my restaurant runs smoothly. This step saves me time and money. I check every detail so I don’t miss anything important.
Here’s my go-to checklist:
- Measure the Space:
I measure wall lengths, aisle widths, and booth footprints twice. - Choose the Right Pattern:
I pick wall banquette, double rows, or corner booths based on my space. - Check Booth Table Sizes:
I match booth tables to seating capacity and make sure they fit the layout. - Plan for Traffic Flow:
I leave enough space for guests and servers to move easily. - Test Comfort:
I sit in a sample booth to check legroom, seat depth, and table height. - Review ADA Compliance:
I make sure at least one booth is accessible for all guests. - Confirm Material Choices:
I pick finishes that match my brand and are easy to clean. - Get Expert Advice:
I ask Yezhi Furniture for layout tips and custom options.
Here’s a simple table to keep track:
| Step | Done? | Notes |
|---|---|---|
| Space measured | [ ] | |
| Pattern chosen | [ ] | |
| Booth tables checked | [ ] | |
| Traffic flow planned | [ ] | |
| Comfort tested | [ ] | |
| ADA reviewed | [ ] | |
| Materials confirmed | [ ] | |
| Expert advice sought | [ ] |
📝 I print this checklist and use it for every project. It helps me stay organized and confident.
When I follow these steps, I know my booth layout will look great and work well for guests and staff. Clear drawings, confirmations, and delivery coordination from the supplier keep the process smooth.
ADA Booth Requirements (Accessibility Basics)
ADA Booth Dimensions (What must be accessible)
ADA-compliant booth seating must provide accessible tables, proper knee space, and the right table height for all guests. I always check these things before I finish my layout. The law says at least 5% of all seating, or at least one section, must be accessible. This means I need booths or tables where wheelchair users can sit with everyone else.
I make sure the table height is between 28 and 34 inches from the floor. This range lets guests in wheelchairs roll up and eat easily. I also plan enough knee space under the table. Guests need to slide their legs under without hitting anything. If I forget these details, some guests might feel left out.
Here’s a quick table I use to check ADA booth requirements:
| Requirement | ADA Standard |
|---|---|
| Accessible Seating | 5% of total, or 1 section |
| Table Height | 28–34 inches |
| Knee Space | Sufficient for wheelchairs |
😊 I always ask the supplier to confirm ADA-related table height and clearances before production. Their team knows how to get every detail right.
Accessible Pathways / Turning Space
Accessible pathways must be at least 36 inches wide to allow easy movement for wheelchairs and mobility aids. I walk the space myself to make sure guests can move easily between booths and tables. If the path feels tight to me, it will feel even tighter for someone using a wheelchair.
Turning space is important too. I leave open areas near accessible booths so guests can turn around without trouble. I picture a circle at least 60 inches wide for a full wheelchair turn. This helps everyone feel welcome and keeps the dining room safe.
Here’s what I always check for accessible pathways:
- Main walkways: 36 inches wide or more
- No sharp turns or obstacles
- Clear space at booth ends for turning
🛠️ I use painter’s tape to mark out these spaces on the floor before ordering. This simple step helps me spot problems early.
Common ADA Mistakes in Booth Layouts
The most common ADA mistakes in booth layouts include not providing enough accessible seating, using tables that are too high or low, and blocking pathways. I see these problems a lot when restaurants rush their design or forget to check the rules.
Here’s a table of mistakes I watch for:
| Mistake | Why It’s a Problem |
|---|---|
| Too few accessible booths | Not enough options for guests with disabilities |
| Table height out of range | Wheelchairs can’t fit comfortably |
| Insufficient knee space | Guests can’t pull up to the table |
| Narrow pathways | Hard for wheelchairs to move through |
I always remember that ADA compliance is not just about following the law. It’s about making every guest feel welcome. A supplier’s footprint drawings and spec checks help me avoid these accessibility mistakes.
Tip: I review my layout with a checklist before placing any orders. This keeps my project on track and makes sure everyone can enjoy the space.
Factors That Change Booth Dimensions (Not One-Size-Fits-All)
Space Constraints
Space constraints set the limits for booth size and layout in any restaurant. When I walk into a new project, I always measure the room first. Small spaces force me to pick booths with shorter lengths or slimmer backs. Large, open rooms let me use bigger booths or even add curved and corner seating. I never try to squeeze in too many booths. That only makes the space feel crowded and uncomfortable.
Here’s what I check when space is tight:
- Wall length and depth
- Distance between booths and walkways
- Room for guests and servers to move
If I have a narrow dining area, I choose single booths or wall banquettes. For wide rooms, I can use double booths or even create cozy corners. Measuring first and confirming footprints with the supplier helps me fit booths without wasting space.
Customer Demographics (families, elderly, quick-turn vs long-stay)
Customer demographics shape booth design to match comfort and privacy needs. I always ask myself, “Who will sit here most?” Families need longer booths with easy access for kids. Elderly guests want higher seats and more support. If my restaurant serves quick meals, I pick booths with upright backs and standard seat depths. For places where guests stay longer, I use deeper seats and plush upholstery.
I use this table to match booth features to guest types:
| Guest Type | Best Booth Features |
|---|---|
| Families | Longer benches, easy entry |
| Elderly | Higher seats, firm support |
| Quick-turn | Upright backs, standard depth |
| Long-stay | Deep seats, soft cushions |
I always design with my main customers in mind. That way, everyone feels comfortable and welcome. Custom options make it easier to match seating to different guest needs.
Restaurant Concept (café vs bar vs hotel lounge)
The restaurant concept decides booth style, size, and finish to match the overall vibe. I look at the brand and theme before I choose any booth. Cafés often use wall banquettes with simple lines. Bars need booths that are easy to clean and can handle busy nights. Hotel lounges call for plush, high-back booths that feel private and upscale.
Here’s a quick list of how I match booth style to concept:
- Cafés: Slim, open booths for a social feel
- Bars: Durable materials, easy-to-clean finishes
- Hotel lounges: Tall backs, soft upholstery, luxury details
I always talk with the owner about the look they want. Then I pick booth dimensions and materials that fit the concept. I match booth style to the venue concept, then confirm materials and specs with the supplier. 🛋️
Every restaurant is different. I adjust booth dimensions for space, guests, and concept to create a layout that works and feels just right.
Material Choices (Durability + Cleaning)
Solid Wood
Solid wood booths offer unmatched durability and a timeless look for restaurant seating. I suggest solid wood when I want seats that last a long time. Solid wood benches and backs do not dent or scratch easily. Oak, walnut, and ash are the best woods for commercial booths. These woods work well in busy restaurants, cafés, and hotel lounges. Solid wood booths make any space feel warm and natural. They stand up to daily use from guests. If they get scratched or stained, I can refinish them. Cleaning solid wood is easy. I wipe it with a damp cloth and mild soap. I do not use strong chemicals so the finish stays nice. For busy places, I ask suppliers about tougher finishes like gunmetal or bronze. These finishes look cool and protect the wood more. 🪵
| Wood Type | Durability | Best Use Case |
|---|---|---|
| Oak | High | Restaurants, cafés |
| Walnut | High | Upscale venues |
| Ash | Medium | Casual dining |
Tip: I always check if the wood is sealed for water and stain resistance before I order.
Metal
Metal booths deliver top-notch strength and are perfect for high-traffic hospitality spaces. I pick metal frames when I need seats that are very strong. Metal does not break or bend easily. It handles bumps, spills, and lots of cleaning. Powder-coated steel and aluminum are the most common metals for restaurant booths. Metal booths do not rust or corrode, even in wet or outdoor places. They are easy to clean, which helps keep things safe. Metal fits modern, industrial, or simple designs. Sometimes I add wood or soft seats to metal frames for comfort. Some modern collections use metal frames with polished details for a cleaner, upscale look. These booths look stylish and last a long time. To clean metal, I use a soft cloth and gentle cleaner. Metal does not soak up stains, so it always looks good. 🧲
| Metal Type | Durability | Best Use Case |
|---|---|---|
| Powder-coated Steel | Very High | Bars, busy restaurants |
| Aluminum | High | Outdoor, casual dining |
Note: I avoid abrasive pads on metal finishes to keep them scratch-free.
Upholstery
Upholstered booths offer the best comfort and style, making them a favorite for long-stay dining and upscale venues. I choose upholstery when I want guests to feel relaxed. Soft seats make restaurants and hotel lounges feel cozy. Vinyl, leather, and performance fabrics are the top picks for commercial booths. Upholstered booths come in many colors and textures to match any brand. They have extra padding for comfort during long meals. Some fabrics are treated to resist water, stains, and fire. I ask suppliers for fabric options that meet required safety standards for my market. For cleaning, I use a damp cloth for quick wipe-downs. For tough stains, I follow the care guide from the maker. Upholstery needs more care than wood or metal, but it is worth it for the comfort. 🛋️
| Upholstery Type | Durability | Best Use Case |
|---|---|---|
| Vinyl | Very High | Family restaurants |
| Leather | High | Lounges, fine dining |
| Performance Fabric | High | Hotels, busy cafés |
Pro Tip: I always test a fabric swatch for stain resistance before making a final choice.
Cleaning & Maintenance by Material (Daily wipe-down reality)
Cleaning and maintaining restaurant booth seating is simple when you match the right routine to each material. I always tell clients that daily care keeps booths looking new and helps them last longer. Each material—solid wood, metal, and upholstery—needs its own approach. I never use a one-size-fits-all method.
Here’s how I handle daily cleaning for each type:
Solid Wood
I wipe solid wood booths with a soft, damp cloth. I use mild soap if there are sticky spots. I avoid soaking the wood or using harsh chemicals. This keeps the finish smooth and prevents damage. For tough stains, I use a wood-safe cleaner. I always dry the surface right away.
Metal
Metal booths are easy to clean. I use a microfiber cloth and a gentle cleaner. I never use abrasive pads because they can scratch the finish. For powder-coated or painted metal, I stick to water and mild soap. I dry the metal to stop water spots or rust. Some commercial finishes are designed to be easier to wipe down and resist staining. 🧽
Upholstery
Upholstered booths need a bit more attention. I vacuum the seats every day to remove crumbs and dust. For vinyl or leather, I wipe with a damp cloth and a little soap. For fabric, I spot-clean stains right away with a fabric-safe cleaner. I always check the care label before using any product. Some commercial-grade fabrics are water-resistant, which makes cleaning much faster.
Here’s a quick table I use to remember the best cleaning methods:
| Material | Daily Cleaning Steps | Pro Tip |
|---|---|---|
| Solid Wood | Damp cloth, mild soap, dry after | Avoid soaking or harsh sprays |
| Metal | Microfiber cloth, gentle cleaner | No abrasive pads, dry after |
| Upholstery | Vacuum, spot clean, check care label | Use water-resistant fabrics |
Tip: I always train my staff to clean spills right away. This stops stains and keeps booths fresh for every guest.
I find that a regular cleaning schedule saves money on repairs and replacements. It also keeps my restaurant looking sharp. These routines work well for most commercial booth seating and help extend service life. If I follow these steps, I know my booths will stand up to busy service and still look great. 🪑
Common Booth Seating Mistakes (What causes rework)
Overcrowding
Packing too many booths into a dining area makes the space feel cramped and uncomfortable. I see this mistake all the time. When I try to squeeze in extra seats, guests lose elbow room and servers struggle to move. Overcrowding leads to slow service, unhappy customers, and even safety issues during busy hours. I always remind myself that more seats do not always mean more profit. If guests feel boxed in, they will not want to come back.
Here are signs that a restaurant has overcrowded booth seating:
- Guests bump into each other or into booth tables when sitting down.
- Servers have trouble moving between booths.
- The dining room feels noisy and stressful.
I always use a floor plan and measure carefully before ordering new booths. YA good layout plan helps balance capacity and comfort without overpacking the room. 😊
Ignoring ADA
Skipping ADA requirements for booth seating can lead to costly rework and unhappy guests. I never want to see a guest struggle to find a seat that works for them. ADA rules make sure everyone can enjoy the restaurant, including people who use wheelchairs or need extra space. If I ignore these rules, I might have to redo my layout or even face fines.
Common ADA mistakes include:
- Not providing enough accessible restaurant booths.
- Using booth tables that are too high or too low for wheelchair users.
- Blocking pathways so guests cannot move freely.
I always check that at least 5% of my seating is accessible. I make sure there is enough knee space and that pathways are at least 36 inches wide. ADA-friendly booth layouts are easier to get right when you confirm table height, knee clearance, and pathways early.
Poor Traffic Flow
Bad traffic flow in a restaurant makes service slow and frustrates both guests and staff. I have learned that even the best booth seating will not work if people cannot move easily. When I plan a layout, I look at how guests enter, where servers walk, and how food gets to the table. If I see bottlenecks or blocked aisles, I know I need to change the plan.
Problems I see with poor traffic flow:
- Main aisles are too narrow for two people to pass.
- Booths block access to exits or restrooms.
- Servers have to take long detours to reach certain tables.
I use this simple table to check my layout:
| Area | Minimum Width | Why It Matters |
|---|---|---|
| Main Aisle | 48 inches | Fast, safe movement |
| Side Aisle | 36 inches | Easy access to booths |
| Pathways | 36 inches | ADA compliance |
I always walk the space myself before finalizing the layout. If I can move easily, I know my guests and staff will too. 🚶♂️
Worn or damaged upholstery, like torn vinyl or sagging cushions, can also make guests question the quality of the restaurant. I always check my booths for signs of wear because even the best layout cannot make up for uncomfortable or neglected seating.
Mismatched Table and Booth Sizes
Mismatched table and booth sizes can ruin the comfort and look of your dining area. I see this mistake often when people order tables and booths separately without checking how they fit together. If the table is too wide or too long, guests struggle to reach their food or slide into the booth. If the table is too small, plates and glasses crowd together, making meals awkward.
Here’s what I always check before placing an order:
- Table width should match the booth’s seat width. For most booths, a 24-inch wide table works best.
- Table length needs to fit the number of seats. A four-person booth usually pairs with a 48-inch long table.
- The table base must not block legroom. Pedestal bases work better than four legs for booth seating.
I use a simple table to compare sizes:
| Booth Size (Seats) | Table Length | Table Width | Best Table Base |
|---|---|---|---|
| 2 | 30″ | 24″ | Pedestal |
| 4 | 48″ | 24″ | Pedestal |
| 6 | 60″ | 24″ | Pedestal |
If I’m unsure, I ask the supplier to confirm table size, base type, and legroom with a simple drawing. Their team helps me match tables and booths so everything fits perfectly. 🪑
Tip: I always test the setup with sample place settings before finalizing my order.
Neglecting Comfort
Neglecting comfort in booth seating leads to unhappy guests and lost business. I learned this the hard way when I picked seats that looked stylish but felt stiff and cramped. Guests want to relax, not rush through their meal. If the seat is too hard, too shallow, or too upright, people won’t stay long.
Here’s what I focus on for comfort:
- Seat depth should be 16–18 inches for most adults.
- Seat height needs to match the table, usually 18 inches.
- Backrest angle should support the spine, not force guests to lean forward.
I always sit in a sample booth before making a decision. If I feel comfortable for at least 30 minutes, I know my guests will too. High-resilience foam and supportive back angles make a noticeable difference in long-stay comfort. This makes a big difference in guest satisfaction. 😊
Note: I ask for fabric samples and test them for softness and durability.
Mixing Up Seat Depth vs Overall Depth (Costly mistake)
Mixing up seat depth and overall depth can cause costly layout errors and wasted space. I see this mistake when people confuse the measurement from the front of the seat to the backrest (seat depth) with the total footprint from the wall to the front edge (overall depth). If I get these numbers wrong, booths may stick out too far or feel too cramped.
Here’s how I keep it straight:
- Seat depth: 16–18 inches (comfortable for sitting)
- Backrest thickness: 3–6 inches (depends on style)
- Overall depth: Seat depth + backrest thickness (usually 22–24 inches)
I use this table to check my measurements:
| Measurement | Typical Range | What It Means |
|---|---|---|
| Seat Depth | 16–18″ | Sitting comfort |
| Backrest Depth | 3–6″ | Support and style |
| Overall Depth | 22–24″ | Total booth footprint |
If I ever feel unsure, I ask the manufacturer for a footprint drawing and a dimension confirmation. Their experts double-check my specs and make sure my restaurant booths fit the space just right. 📝
Pro Tip: I always mark out booth footprints with tape on the floor before ordering. This helps me spot mistakes early.
Not Planning for Back-to-Back Footprint
Not planning for the full back-to-back footprint is one of the most expensive mistakes you can make when installing restaurant booths. I see this problem all the time. People measure only the booth seat or the table, but they forget to add up the total space needed for two booths placed back-to-back with a table in between. This mistake leads to crowded aisles, blocked walkways, and sometimes even the need to reorder furniture. That costs time and money.
When I plan my layout, I always look at the total footprint, not just the booth itself. Here’s what I include every time:
- Depth of the first booth seat (usually 23–24 inches)
- Table width (18–24 inches)
- Depth of the second booth seat (another 23–24 inches)
- Extra space for comfort or cleaning (1–2 inches if possible)
If I skip any of these, I risk making the dining room feel cramped. Guests might bump into each other or struggle to slide in and out. Servers may have trouble moving trays through the aisles. That’s not the experience I want for my restaurant.
Here’s a simple table I use to check the total back-to-back footprint:
| Component | Typical Size (inches) |
|---|---|
| Booth seat (side 1) | 23–24 |
| Table width | 18–24 |
| Booth seat (side 2) | 23–24 |
| Total | 64–74 |
I always mark this footprint on the floor with painter’s tape before I order. This trick helps me see if the space feels right. If I can walk between the booths and move around easily, I know my plan works.
📝 Tip: Never guess the total width. Always add up both booth depths and the table. If you’re unsure, ask your supplier for a layout drawing.
Footprint diagrams and clear drawings help avoid this mistake and reduce rework risk. Their team checks my measurements and suggests adjustments if needed. I find this support saves me from costly rework and keeps my project on schedule.
If you want your restaurant booths to fit perfectly and your dining room to flow smoothly, always plan for the full back-to-back footprint. This small step makes a big difference in comfort, safety, and the overall look of your space. 🚶♀️
Practical Tips (Make the layout real before you order)
Measuring Space
I always start by measuring my space carefully before I order any booth seating. Getting the right numbers helps me avoid costly mistakes and keeps my project on track. I grab a tape measure and check every wall, corner, and walkway. I write down the length, width, and height of each area where I want to place booths. I also measure doorways and any obstacles, like columns or radiators.
Here’s a quick checklist I use every time:
- Measure wall lengths where booths will go
- Check the depth from the wall to the aisle
- Note the height of windowsills or ledges
- Mark any power outlets or vents
- Measure doorways for delivery access
Tip: I always double-check my numbers. If I make a mistake here, it can throw off the whole layout. 📏
Working with Suppliers
I get the best results when I work closely with my furniture supplier from the start. I share my measurements, floor plans, and any special needs right away. This helps the supplier suggest the best booth sizes and styles for my space. I ask questions about materials, finishes, and lead times. I also request samples if I want to see colors or fabrics in person.
Here’s how I keep the process smooth:
- Send clear measurements and photos of my space
- Ask for layout drawings or 3D renderings
- Discuss mix-model options if I want different booth styles
- Confirm the supplier’s after-sales policy for peace of mind
Clear drawings, quick responses, and spec checks from the supplier keep the project on track. Their team helps me avoid common mistakes and makes sure my order fits my project timeline. If I need custom features or ADA-compliant booths, they guide me through every step.
😊 I find that open communication with my supplier saves time and reduces stress.
Testing Layouts
I always test my booth layout before placing a final order. This step helps me see how the space will feel in real life. I use painter’s tape or cardboard to mark out booth footprints on the floor. I walk through the space to check if guests and servers can move easily. I also sit in a sample chair or booth, if possible, to test comfort and reach.
Here’s a simple table I use to review my test layout:
| Test Step | What I Check |
|---|---|
| Walkways | Can two people pass easily? |
| Booth Entry | Is there enough room to slide in? |
| Table Reach | Can I reach the table comfortably? |
| Traffic Flow | Are exits and restrooms clear? |
If something feels tight or awkward, I adjust my plan before ordering. Ask the supplier for layout drawings or mockups to visualize the final setup. This extra step gives me confidence that my restaurant will look great and work well for everyone. 🪑
Tape-It-Out Method (Mock the footprint in 30 minutes)
The tape-it-out method is the fastest way to see if your booth layout will work before you order. I use this trick every time I plan a new restaurant or café. It helps me spot problems early and saves me from costly mistakes. All I need is a roll of painter’s tape, a tape measure, and about half an hour.
Here’s how I do it step by step:
- Clear the Area
I move chairs, tables, and anything else out of the way. This gives me a blank canvas to work with. - Mark the Booth Footprint
I measure the booth dimensions—length, depth, and width—using my tape measure. Then, I use painter’s tape to outline each booth on the floor. I make sure to include the table and aisle space in my markings. - Add Tables and Aisles
I tape out the table size in the middle of each booth. I also mark the aisle widths between booths and along the main walkways. This helps me see if people can move easily. - Walk the Space
I walk through the taped layout like a guest or server. I check if I can slide into booths, reach the table, and pass by others without bumping into anything. - Adjust as Needed
If something feels tight or awkward, I move the tape and try again. I keep adjusting until the space feels right.
📝 Tip: I always invite a friend or team member to test the layout with me. A second opinion helps catch things I might miss.
Here’s a quick table to keep my tape-it-out session organized:
| Step | What to Measure | Typical Size/Range |
|---|---|---|
| Booth Depth | Seat + back thickness | 22–24 inches |
| Table Width | Eating surface | 24 inches |
| Aisle Width | Main walkway | 36–48 inches |
| Booth Length | Per seating capacity | 48–60 inches |
I find this method especially useful when I want to mix different booth styles or test custom sizes. I always tape out the layout before placing a big order to catch spacing problems early. Their team can even provide layout drawings to match my taped plan.
The tape-it-out method gives me confidence that my booth seating will fit and feel comfortable. I can see the flow, check for bottlenecks, and make changes before spending any money. It’s a simple, hands-on way to make sure my restaurant or hotel project starts off right. 🟦
Getting restaurant booth dimensions and spacing right helps your space feel comfortable, work well, and follow the rules. I always remember these important steps:
- Measure your space first and pick booth sizes that fit.
- Leave at least 36 inches between booth backs and make main aisles 48 inches wide.
- Try out your layout before you buy anything.
If you want the project to run smoothly, start with the quick chart, tape out the footprint, and confirm aisle widths before you place an order. If you need custom sizes or drawings, Yezhi Furniture can support specs and layout planning.
FAQ
What are the most common restaurant booth sizes?
A practical rule is ~24″ of bench length per person (per side). Common bench lengths are 48″ (2 seats), 72″ (3 seats), and 96″ (4 seats). Then you match table length to seating (e.g., 48″ table for 4 seats total, 60″ table for 6 seats total).
How much space should I leave between booths?
I always leave at least 36 inches between booth backs. This gives guests and servers room to move. For main aisles, I use 48 inches. If you want a smooth flow, stick to these numbers. 🚶♂️
Can I customize booth dimensions for my space?
Yes, booths can be customized in size, shape, and materials—especially for odd corners or special layouts—once you provide measurements and a simple sketch.
What is the best material for easy cleaning?
Vinyl and metal are the easiest to clean. I wipe vinyl with a damp cloth. Metal frames handle spills and daily cleaning. For busy restaurants, I pick these materials. Yezhi Furniture offers both, plus water-resistant fabrics.
How do I make sure my booths are ADA compliant?
I follow ADA rules by providing at least one accessible booth. The table height should be 28–34 inches. I leave 36 inches for pathways. I check knee space under the table. This way, everyone feels welcome. ♿
What is the ideal seat depth for comfort?
I use a seat depth of 16–18 inches for most guests. This keeps people comfortable during meals. For lounges, I might go deeper. I always test the seat before ordering.
How long does it take to get custom booths from Yezhi Furniture?
For most projects, production is about 30 days, and sea shipping is commonly another ~30 days depending on destination and routing. ⏳
Can I mix different booth styles in one order?
Yes, many manufacturers allow mixing models, colors, and materials in one order, which helps create a cohesive look across the venue.